Has your Strava App stopped working? Fix it with this guide!
Obviously, this guide has absolutely nothing to do with Custom USB Flash Drives but if our tech savvy team can help you out, they invariably will, so let’s get started.
Problem – Strava App on Android no longer recording data correctly.
Have you gone on a run or ride lately, tried your heart out, hit save activity on Strava expecting to beat your previous PB?
Only to find that what was an hour-long exercise session has been condensed into 5 minutes of movement in a perfectly straight line at a speed a Bugatti Veyron would be proud of?
If you have, you most certainly are not alone, you’ll find similar complaints all over the net, on reddit, on the apps google store page etc etc.
The likely issue is that Strava is unable to run location settings while the phone’s screen is off and we’ll now show you how to fix it.
*Apologies in advance if this guide doesn’t solve your issue, we’ve tried on multiple devices and found the solution works but unfortunately technology is complicated and there’s no guarantee this will work on your device or that you’re even experiencing the same problem.
Other common issues are having ‘battery saver’ switched on or your general battery settings.
Of course this is all at your own risk on whether you use any of these settings. Whenever you’re changing app settings, it’s prudent to note down or remember your original settings in case you want to go back to them or don’t feel comfortable giving applications certain levels of freedom – our view is that keeping your device as secure as possible should be your main priority.
With that out of the way – Let’s Start.
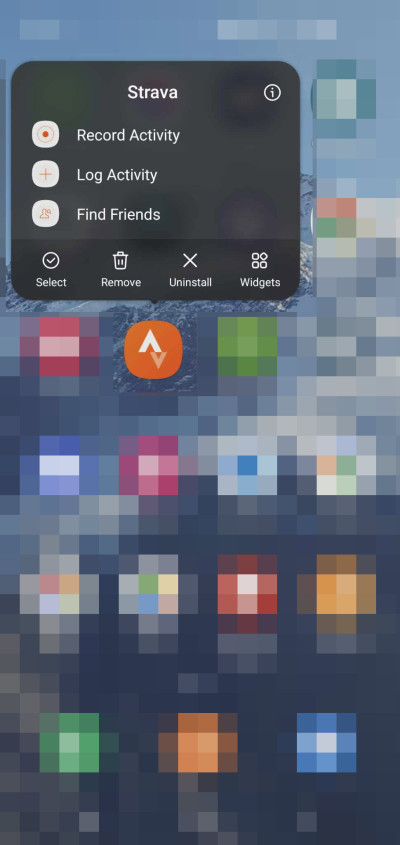
1. Navigate to the app on your phone’s desktop or app screen.

2. Press your finger down on the Strava icon and hold it in place until additional options appear, then tap the ⓘ symbol in the top right corner.
3. The next screen will show an overview of the current App info for Strava, from here tap ‘Permissions’.
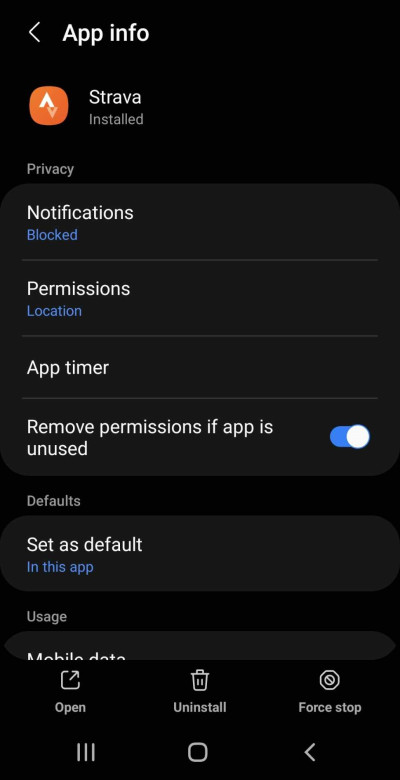
4. This will take you to the App Permissions screen and from here tap ‘Location’.
*Your screen may look different depending on how many permissions you allow the app to have. We always try to give the minimum number of permissions, while allowing an app to function as you want it to. In this case we just want maximum tracking accuracy.

5. The next screen shows the type of Location Permission and gives the option to allow for precise location tracking. The options we’ve selected below on the left side image have worked for us (along with the other settings further down the guide).
For comparison, see the screenshot below on the right showing the options for Google Maps, including ‘Allow all the time’.
It’s possible that were this an option for Strava then it would solve the tracking issues.
As of November 2023 it isn’t an option however, should that change in future then you may not need to finish the remaining setting changes but we can’t know for sure.


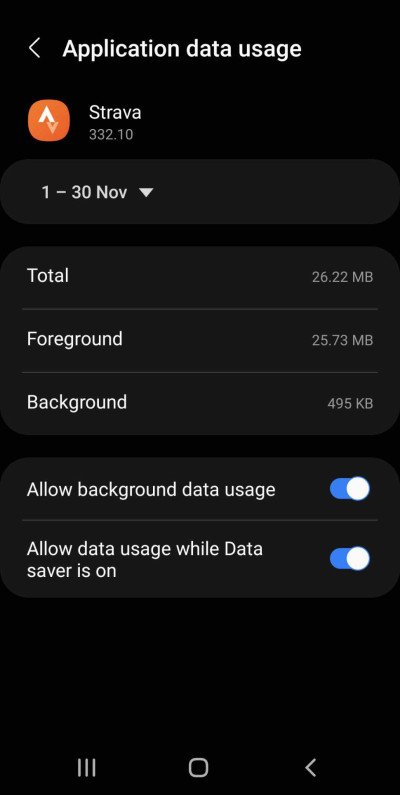
6. Now that’s done, navigate back to the App info screen by hitting back twice or repeating steps 1 & 2. From here scroll down until you see Usage and the Mobile Data and Battery information. Now tap ‘Mobile Data’.

7. Depending on your current settings, this is likely a reason why your runs or rides are no longer tracking correctly. What is happening is that as soon as you lock your screen after starting an activity on Strava it also stops its ability to run properly in the background, switching off location tracking and leading to the dreaded point to point tracking at ridiculous speed. Using the settings shown below allow it to use data in the background.
8. Once that is done, tap back or use steps 1 & 2 then scroll down again to show the apps Battery usage. Tap Battery to be taken to the screen shown below on the right. Again, with the view to allowing Strava to work while the phone screen is off, we’ve selected Unrestricted.

9. You’re done, well mostly done. You can now do a test run / hike / walk / jog / cycle / canoe / swim etc etc.
You’ve finished updating the settings we found fixed the issue for us so there’s nothing left to do but to try them for yourself.
Good luck and we genuinely hope this guide helped.
Thank you for reading, come back next time for another exciting blog post!