How to set your own icon for a USB Flash Drive
Today we’re going to teach you how to set your very own icon on a USB Flash Drive
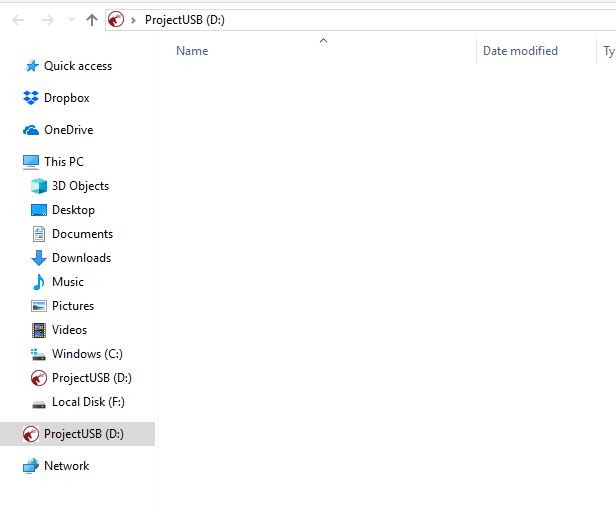
Just like this finished example below:
Things you’ll need: USB Flash Drive, Windows 10 Computer and an Icon file.
*it is possible to create your own .icon file using paint however we recommend converting your image using a free online tool. An example can be found at http://icoconvert.com/
Lets get on with it shall we
Step 1 – Insert your USB Flash Drive into your Windows Computer and wait for it to show on your device
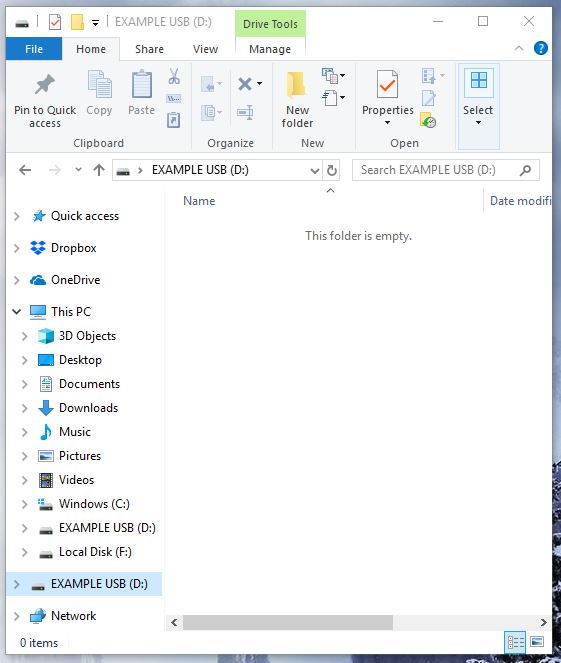
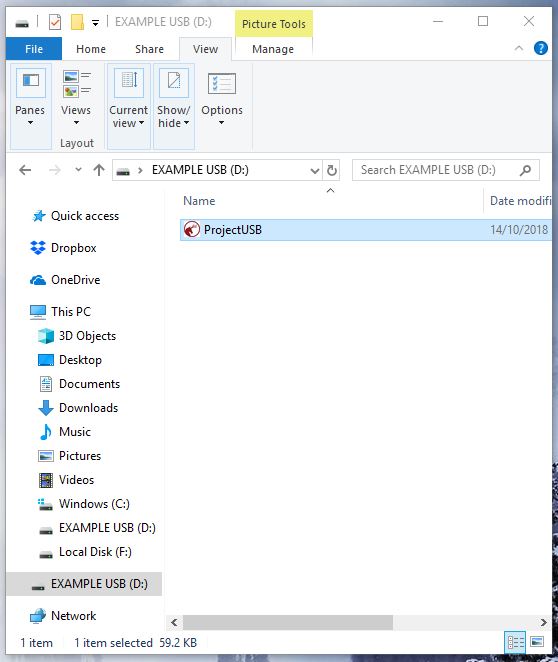
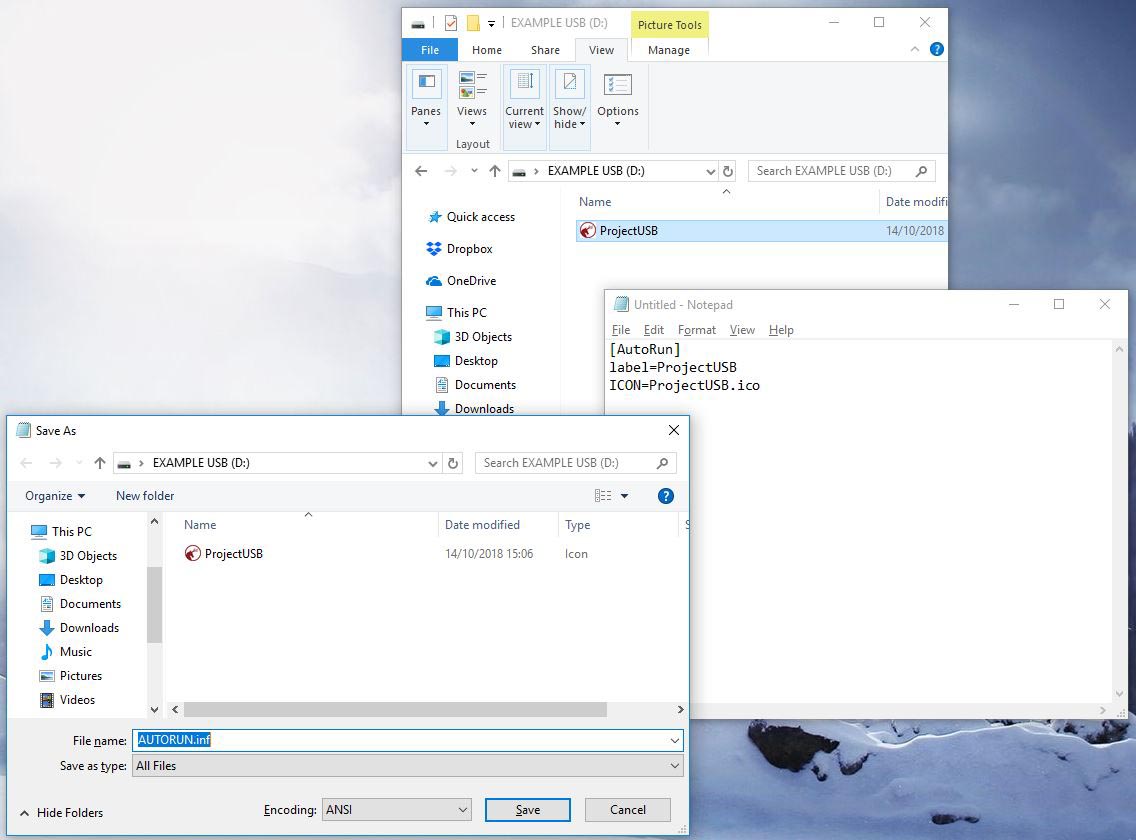
Step 2 – Copy & Paste your .icon file to the USB memory stick. You have to copy the file into the root of your Drive rather than a subfolder (we’ll hide it later, don’t worry)
Step 3 – Show hidden files, to do this simply click ‘View’ in the top bar then check the box ‘Hidden items’
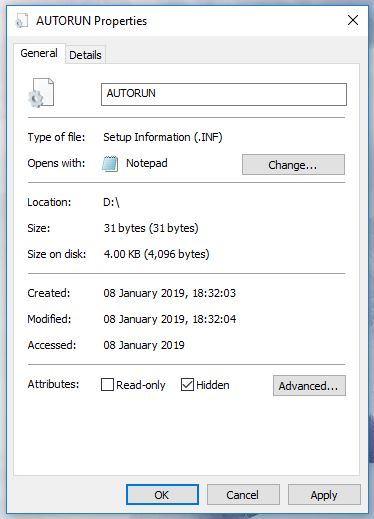
*if a .INF file exists skip to Step 6

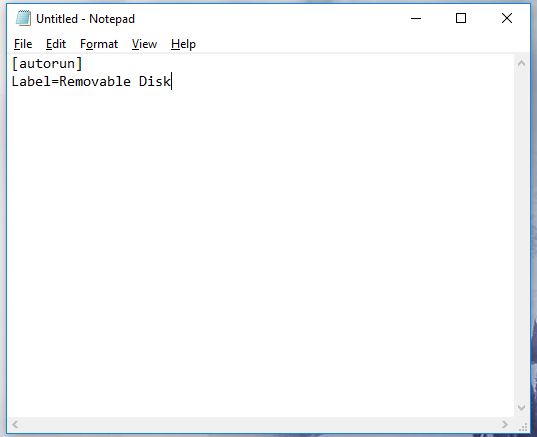
Step 4 – You’re going to create a new file using Notepad. Search Notepad in the windows search box towards the bottom left of your screen then open the application.
Then type (or Copy & Paste from here):
[autorun]
Label=Removable Disk
Save this Notepad file (again in the root of your USB Drive) with the name: AUTORUN.INF
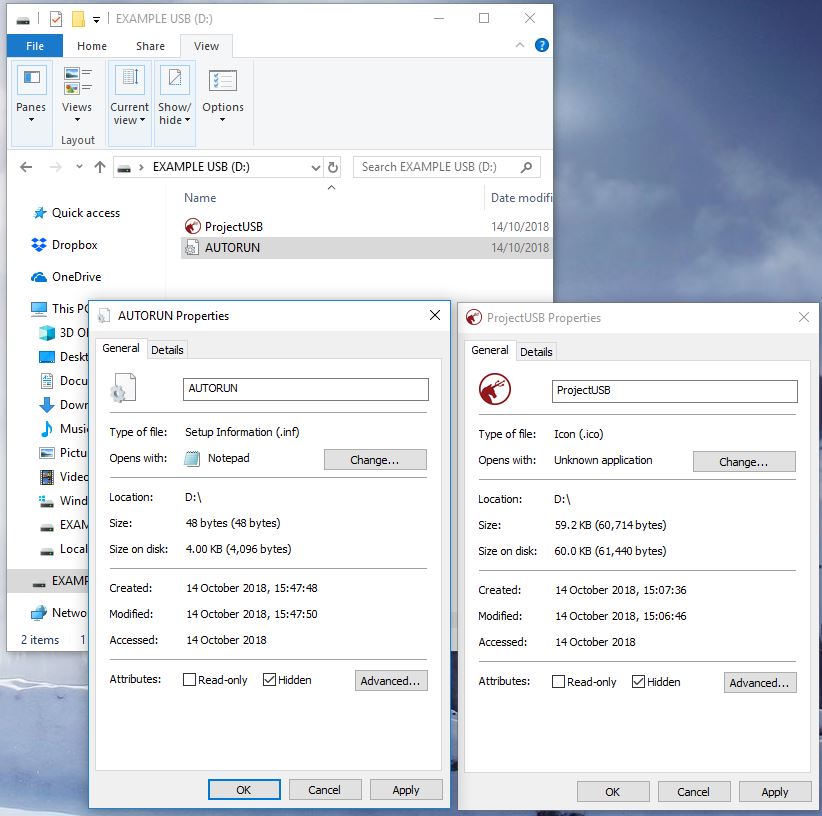
Step 5 – Right click the AUTORUN.INF file and uncheck ‘Read-only’, also make sure ‘Hidden’ is checked.
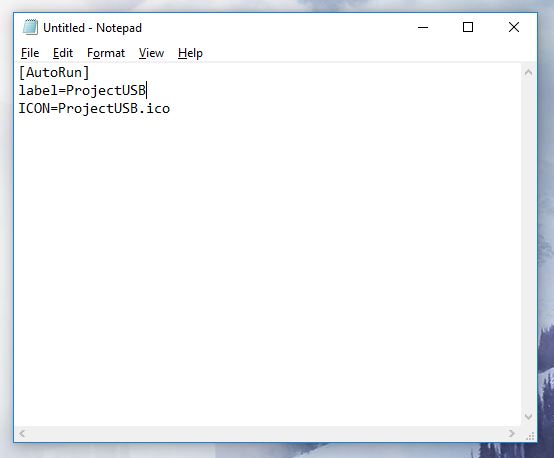
Step 6 – Now it’s time to add your personal touch, to do this open the AUTORUN.INF again in Notepad.
Update the text to:
[autorun]
Label= The Drive name you’d like
Icon= icon.ico (the name of your icon file)
For example we used:
[autorun]
Label=ProjectUSB
Icon=ProjectUSB.ico
‘Label’ changes the drive name and ‘Icon’ tells the computer to automatically show your icon file instead of the generic USB Drive icon.
Step 7 – Navigate back to ‘View’ in the top bar and uncheck ‘Hidden items’ (this means you won’t see the icon file or the Autorun file but you will still get the effect).

Step 8 – Eject the USB device and then reinsert it into your computer. Now you should see your icon and new device name.
Thank you for reading, hopefully you’ve found this tutorial helpful.
Come back next time for another exciting blog post